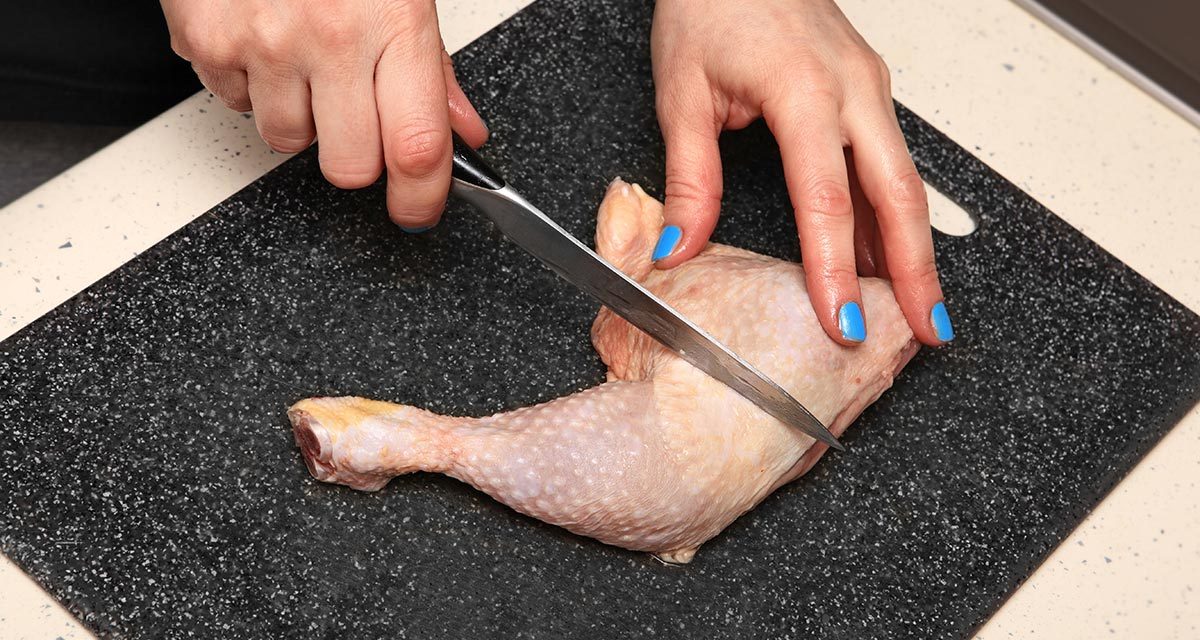
The object of this month’s butchery and cookery exercise is to make chicken Kiev with a boned-out chicken thigh. Tunnel boning the chicken thigh is a delicate operation, requiring a deft-hand as well as a skinny, small sharp knife blade; a paring knife will suffice, a short skinny “winter whiting” profiled filleting blade would be even better.
For this month’s sequence, we will use a paring knife. The paring knife is versatile, and is hopefully one of the minimum four or five knives that you could have in your kitchen’s knife block. A very long-bladed standard chef’s knife, as well as a Santoku (it takes the place of a smaller chef’s knife), plus a butcher’s knife (for cutting steaks) and a boning knife would round out our basic set for raw meat and vegetable preparation. A cleaver would be our sixth if you are wondering. But we do confess to having a more numerous collection. Number seven is a flexible boning knife, aka seafood filleter, however we have a dozen or so of these for different fish species, sizes and body shapes. You get the picture!
So, let’s take a paring knife and tunnel bone a chicken thigh.
Thigh butchery
Starting with whole chicken legs, start with a Maryland cut and then separate the drumstick from the thigh.
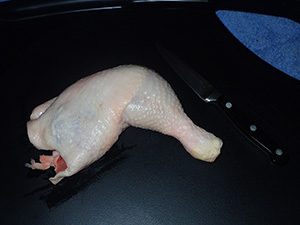
To locate the joint between the thigh and the shank, which is also the area through which to cut; bend the drumstick in towards the thigh. Then push your finger into the top/outside of the folded joint until you feel the knob at the “knee” end of the femur (thigh bone). Feel towards the drumstick and you will soon feel the knee end of the chicken shank. Running your finger backwards and forwards between the two ends of bone will reveal a substantial indentation, a “dint” if you like, between the two ends of the two major bones.
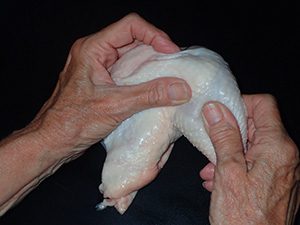
A close-up of the index finger locating the point/dint at which to cut through the joint.
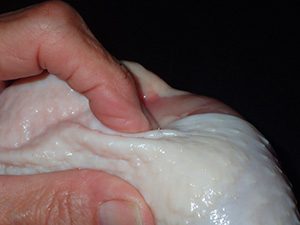
Point the joint upwards. Now take your paring knife and cut down through the “dint” for a few centimetres. Your knife should slide right through with this alignment technique. If there is resistance, then you’ve got the wrong spot.
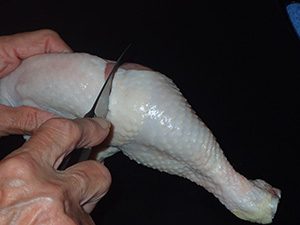
Then place the Maryland “fleshside” down on the cutting board and continue the cut in order to slice all the way through the meat.
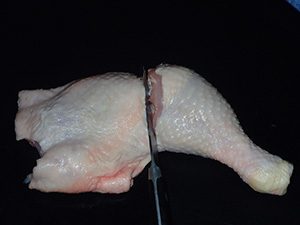
Thus, separating the thigh and drumstick. Set the drumstick aside, we will use it for “drummies” in a future recipe. We picked up the term drummies from our local butcher; he trims the knuckles away from the end of the shank bone and presents them Frenched (but that’s another story for a future edition).
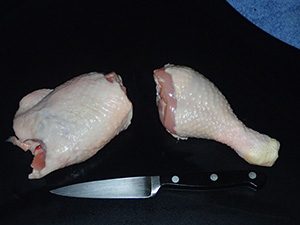
The thigh cut, with bone-in, and the “inside of the thigh” facing upwards.
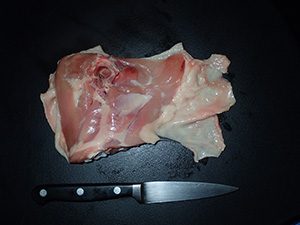
Now remove the thigh’s skin by pushing your fingers between the skin and the flesh. The skin at one end/side of the thigh meat will be easier to get started than the other. Start at the easy end. A knife is not required until you get to the very end (the more difficult end) of the skin removal when you’ll wish to also cut away the fat which is attached to the skin.
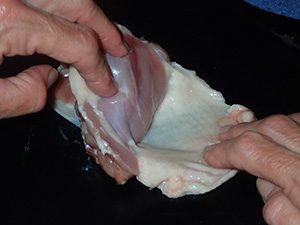
Using the paring knife, cut away the fat at the end and with it discard the skin (it along with the discarded bones are perfect for the stock pile).
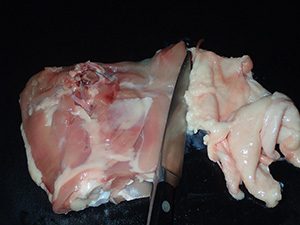
Flip over the thigh so that the other side (inside) is upwards. Locate the single bone that runs through the cut of meat. Using the knife blade, cut under the knuckle at the end of the blade as shown. The aim is to remove the full length of this thigh bone by separating it from the meat while leaving the meat mostly intact.
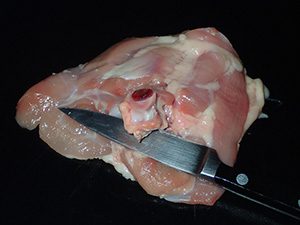
Now tunnel bone the thigh fillet in order to remove the bone. Push the knife through, along the bone and under the bone, from one end of the bone to the other. Once you’ve cut under the bone, also run the knife up each side of the bone without cutting through the tunnel.
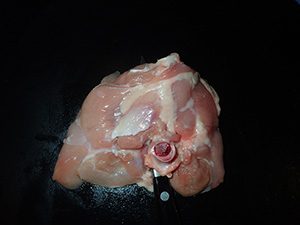
With the bone about 70 per cent separated from the meat, take hold of the knuckle and lift it up and out of the tunnel and shave the paring knife blade down the shank of the bone in order to separate the remainder of the meat away from the bone. Once you get to the end of the bone, cut around the other end of the bone and free it from the thigh.
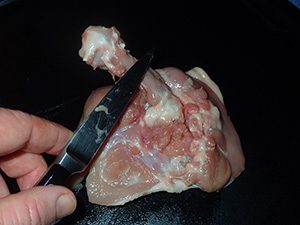
The thigh bone separated from the thigh meat.
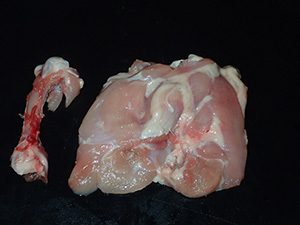
The view from above. The pocket that is left behind from the bone extraction serves two purposes. The garlic and butter Kiev mixture can be piped into the hollow. As well having the connection(s) still intact show you which way to fold the thigh pocket closed for a natural sit on the plate and an orientation that holds together better with the Kiev butter inside.
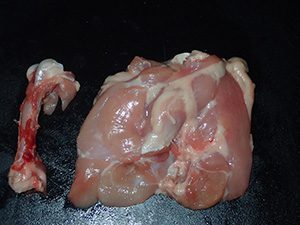
Next month we will produce a thigh fillet (for poultry parmigiana) from the same cut of meat.
For now, let’s cook the chicken Kiev.
Recipe
Chicken thigh Kiev
Chicken thighs, aka thigh fillets or thigh cutlets, are my favourite cut of chicken. Don’t get us wrong, we love breadcrumbed Marylands, as well as marinated drumsticks and spicy wings, however with thighs we can do it all; skin on or skin off. Similarily to chicken breasts, chicken thighs are a versatile cut. The thigh has a higher fat content than the breast, giving it more flavour and making it the perfect cut for slow-cooked casseroles and stews (and pies) as well as for the traditional recipes often used with breast meat. For example, chicken Kiev.
Handy Hint: When taken from a small-framed chicken; the thighs are only just a bit bigger than chicken nuggets.
Ingredients
- 125 g softened butter
- 2 cloves garlic, finely grated
- 2 tablespoons flat leaf parsley, finely chopped
- chicken thighs (tunnel boned)
- 1 cup plain flour
- 2 eggs, beaten
- 1/2 cup milk
- 2 cups Panko breadcrumbs
You can use two large chicken thighs per person or up to half-a-dozen boned thighs from quite small birds. These small thighs can be as small as nugget/finger-food sized.
Method
In a bowl, combine the softened butter, garlic and finely chopped parsley. Place this combined butter mixture onto a piece of plastic wrap and form/roll it into a sausage shape. Roll the butter mixture up in the plastic wrap in Cheerio sized pieces and refrigerate until ready to use. While in the fridge the butter mixture will firm up.
Once the fingers of garlic and herb butter are firm; remove them from the fridge and slide them into the tunnel-boned pockets in the chicken thighs. Then fold the thighs “closed” in order to contain the butter. Place the thighs back in the fridge until you are ready to cook them.
Take the butter-stuffed chicken out of the fridge. Arrange three shallows bowls on your workbench. In one bowl, place the plain flour, in another combine the beaten egg and milk, and in the third bowl, put the breadcrumbs.
Now it is assembly line time – dip the closed chicken Kiev into the plain flour, ensuring that all the chicken’s outside surfaces are covered in flour. The flour will also help to “plaster” any of the chicken thigh’s nooks and crevices together. Next place the Kiev into the egg/milk mixture and coat thoroughly. Now roll the Kiev in the breadcrumbs ensuring that all the exterior surfaces are well coated. Repeat this process with the remaining Kievs. Place the breadcrumb coated Kievs back into the refrigerator until you are ready to cook them.
We used a Kambrook AirChef air fryer for frying the chicken Kievs. Set the temperature of the air fryer to 180°C. When the temperature reaches 180°C , lightly spray the coated Kievs with a little olive oil and then carefully place them into the basket of the fryer. Place the basket into the air fryer and cook in 10-minute periods until the chicken is cooked through and the coating is golden brown. The AirFryer fries the crumbed chicken thighs without using any oil except the light spray.

