Not every fish fillet needs to be completely skinned or lose its tail, says our home butcher STEVE BAIN.
The idea with this version of a fish fillet is that having the tail still attached to the fillet lets the diner know that the skin is attached to the other side.
The fillet is presented on the plate, flesh side up, and the eating methodology involves using a knife and the edge of a fork to separate the beautiful, delicate fish flesh from the inside of the skin.
Most diners will leave the skin on the plate, however, there are techniques that crisp the skin for those that love the crunch (this concept has been covered in previous editions).
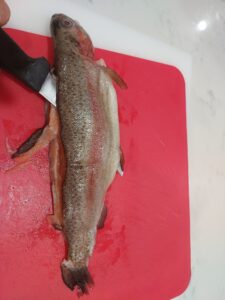
I’ve used a rainbow trout for my demonstration.
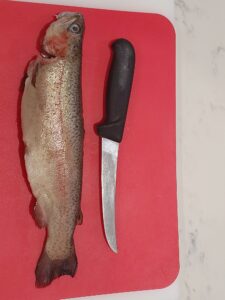
Step 1: A very sharp filleting knife is a useful tool when filleting rainbow trout as their flesh is very delicate. In this case the trout is gutted but not scaled.
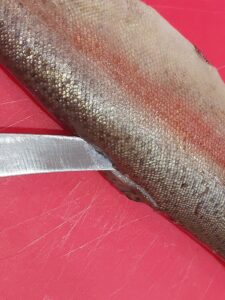
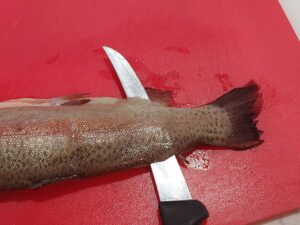
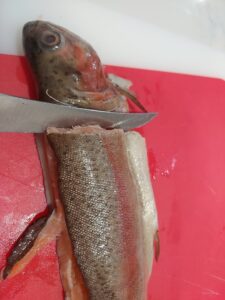
Step 2: Start with an incision about 1.5cm deep along the back of the trout (starting near to the head) and ensure that you are careful to continue this first cut along the back of the fish on one side of the dorsal fin and dorsal bones to separate the fillet form the dorsal fin(s). Focusing on this ensures that you address the removal of the dorsal bones from the fillet(s). Cut from the head towards the tail.
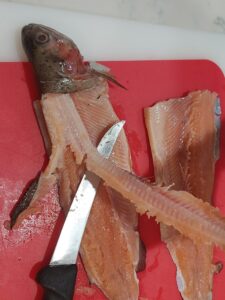
Step 3: Continue cutting along one side of the backbone until you get to the tail wrist, and once you are past the stomach cavity, push the point of the knife all of the way through and out the other side as shown in the photo.
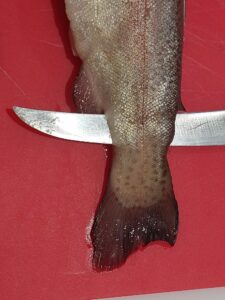
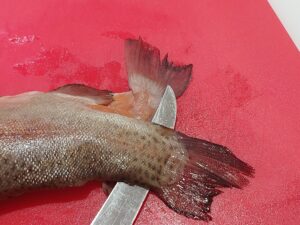
Step 4: Continue the knife’s path towards the tail and cut into the tail to split it into two ‘flaps’. This is where the sharp knife comes in very handy.
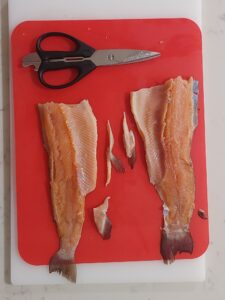
Step 5: The split tail.

Step 6: Then, make a cut where you would to severe the head from the fillet – there’s no need to go all the way through yet, just make the cut/slice at this stage.
Step 7: Next flip the fish over and remove the fillet from the other side by a similar technique. When you get the knife towards the tail, it is time to slow down and carefully obey the following guidance.
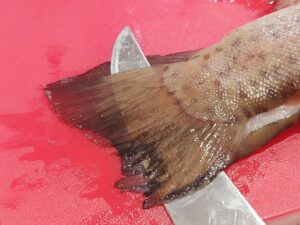
Step 8: Continue to cut along the upper side of the trout’s backbone. Stop when you get to the last bones along the backbone, before you get to the tail. This next step is the ‘trick’ to the whole deal of having a piece of ‘shaved’ tail attached to each fillet.
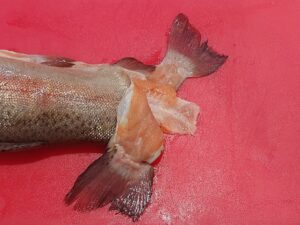
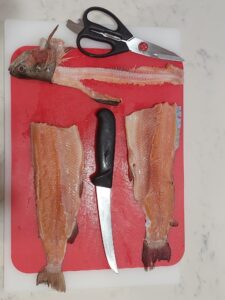
Step 9: When you get to the end of the backbone, cut through the backbone in a manner that leaves the split tail attached to the upper fillet (and with the tail separated from the backbone). In this photo you can see the two separate slivers of tail as well as the backbone’s tail ‘stub’.
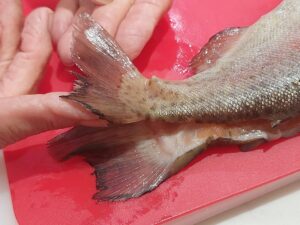
Step 10: Make sure that both fillets are separated from the trout’s backbone. Do this by running the knife edge through the rib cage area on both sides of the fish (the intent here is to leave the bones in the fillet – but you can remove them if you wish; it depends on the guests at your table)
Step 11: Now cut through behind the head and remove one fillet (sans backbone) from the trout.
Step 12: Now with careful knifework, remove the backbone (including removal of the bones along the dorsal).
Step 13: Cut the remaining areas where the remaining fillet is attached to the head to remove the fillets and leave a head with the backbone still attached. These fillets have been cut this way to fit into the baking tray that is going into the oven. (nb: if you have a wider oven or smaller fish, you can also spit the head and have half of it attached to each fillet, thus only the backbone is ‘discarded’ – this is a technique that I will cover sometime in the future)
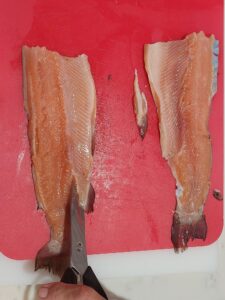
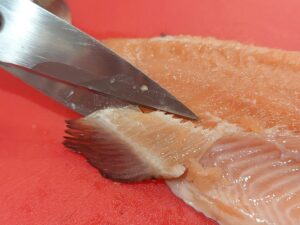
Step 14: Finally, using kitchen scissors, cut/trim the fins etc away from the fillets.
Step 15: The final trim – a close-up of the kitchen scissors snipping a fin away from the fillet(s).
Step 16: The fillets ready for the recipe.